Directory
 Download User Manual - TuneCable Spotify Downloader
![]() Tip: Want to use TuneCable Spotify Downloader on Android? Please refer to this tutorial.
Tip: Want to use TuneCable Spotify Downloader on Android? Please refer to this tutorial.
Part 1. Register TuneCable Spotify Downloader
Note: If you have not downloaded or installed the powerful TuneCable Spotify Downloader yet, click the button to get it free or buy it now.
Step 1. Click on the avatar icon in the lower left of the sidebar. Or click the top-right "Menu" button and choose "Register" in the drop-down list, and you will get the registration interface.
Step 2. Copy and paste the registration Email and Code into the registration box, and then click the "Register" button.
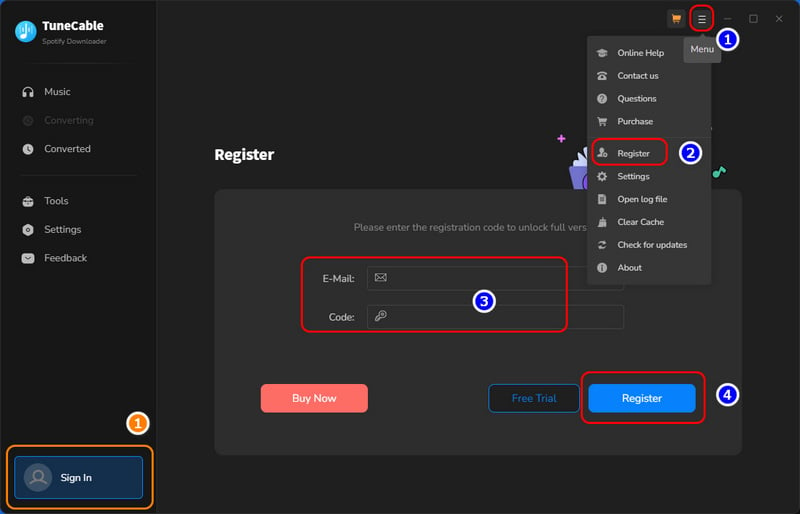
Note: The registration info is case-sensitive. And, please do not add a blank at the beginning or the end of the word.
Part 2. Convert Spotify Music to MP3/AAC/WAV/FLAC/AIFF/ALAC
TuneCable Spotify Downloader supports downloading music from the Spotify app and the Spotify web player. You can download music in original quality at up to 10x conversion speed. Follow the same steps to download Spotify songs.
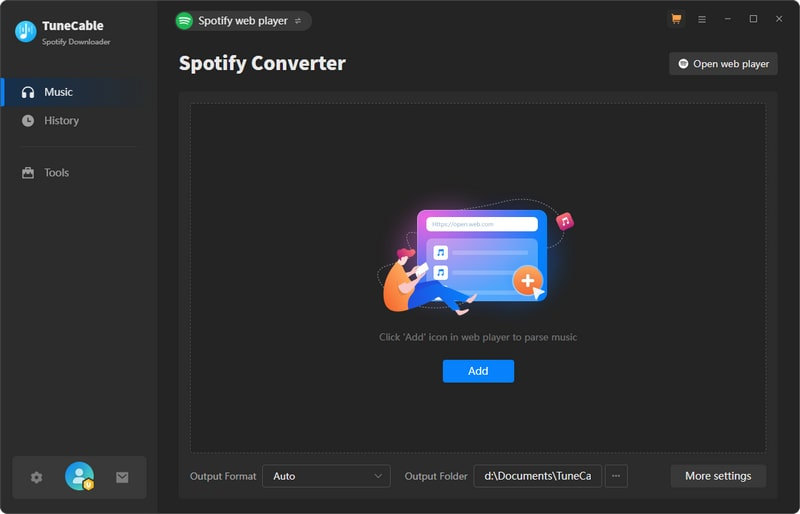
Step 1. Run TuneCable Spotify Downloader
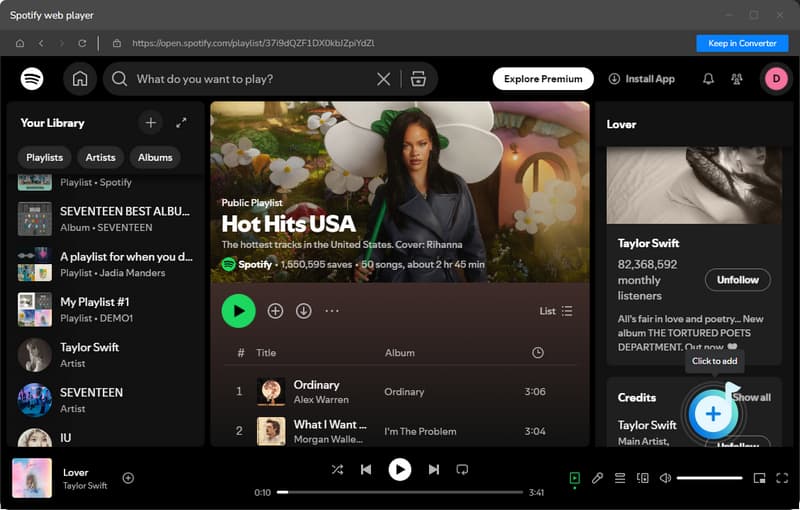
Launch TuneCable Spotify Downloader on Windows. Go to the top navigation bar, you can select a download source, namely the "Spotify App" and "Spotify web player".
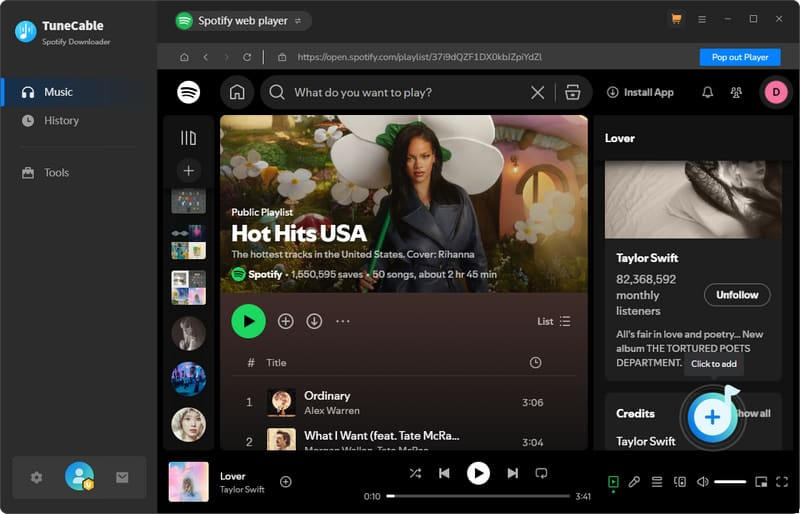
When choosing the Spotify app, it will open automatically. If not, click "Open App". When choosing the Spotify web player, the Spotify web player will be embedded in the converter by default. By clicking "Keep in Converter" or "Pop out Player", you can decide how the web player is located. Next, please sign in to your Spotify account. A free Spotify account is allowed.
Step 2. Add Tracks or Playlists from Spotify to TuneCable
To add songs to TuneCable, there are three methods.
- Method 1. Drag and drop a song, playlist, album, or podcast from the Spotify app to the designated area of TuneCable. (Only available when downloading music from the Spotify app)
- Method 2. Copy and paste the link into the parse bar and press the Enter key. (Only available when downloading music from the Spotify app)
- Method 3. Hit the "Click to add" button floating in the bottom right of the Spotify Music.
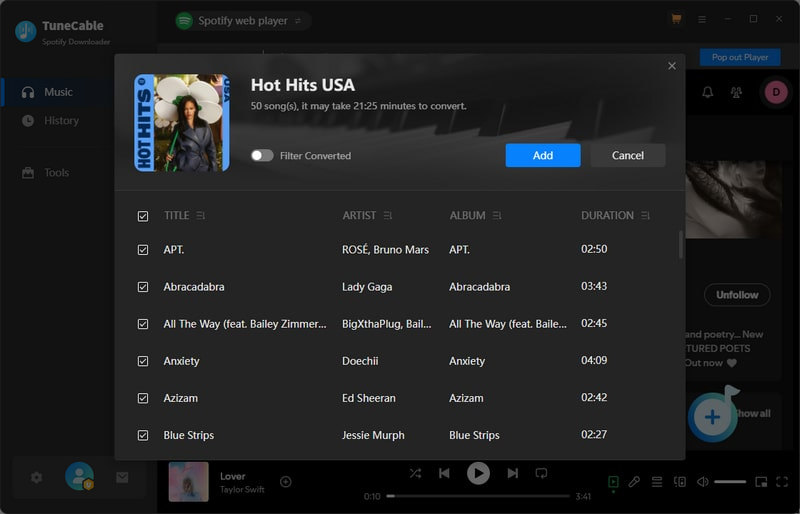
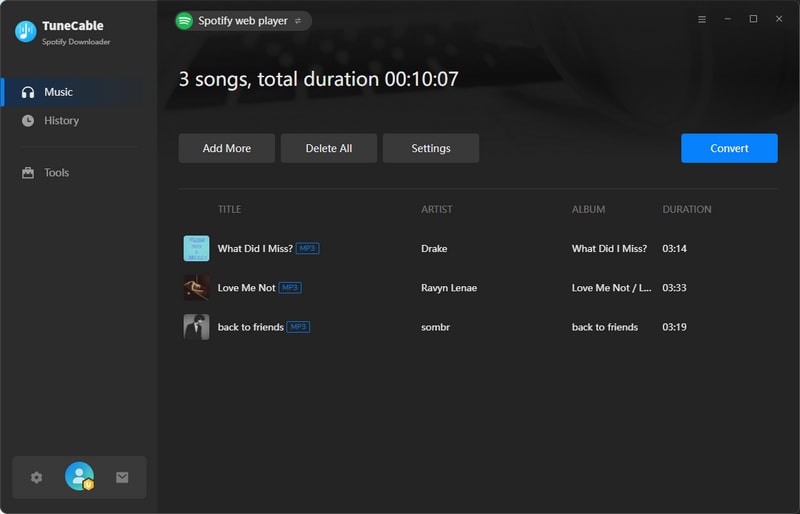
Step 3. Select Spotify Music Tracks
TuneCable will read and load the songs on a popup. Select the songs and click "Add".
Step 4. Set Preferences of TuneCable Spotify Downloader
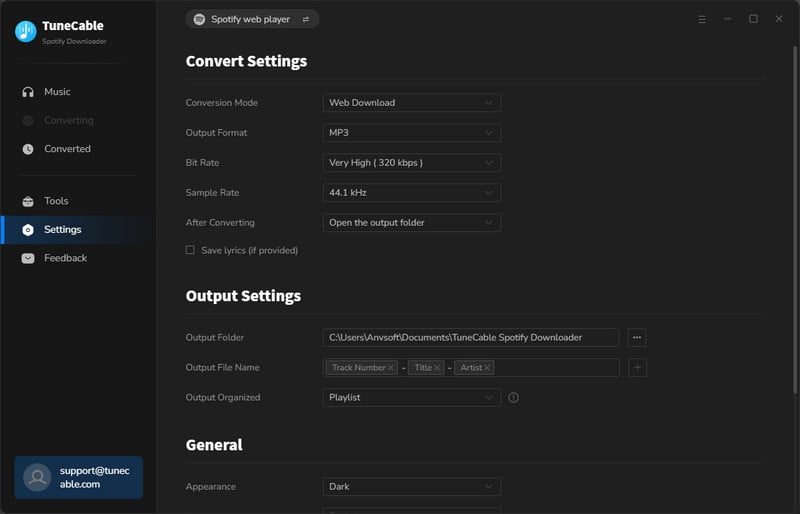
Click the "Settings" icon in the left bar, and then there will be an interface that allows you to set the output parameters.
- Conversion Mode: Intelligent Mode, Record Mode, YouTube Mode
- Output Format: Recommended, MP3, AAC, WAV, AIFF, ALAC, FLAC
- Bit Rate: 128kbps, 192kbps, 256kbps, 320kbps (available for MP3, AAC)
- Bit Depth: 16 bit, 24 bit (available for WAV, AIFF, ALAC, FLAC)
- Sample Rate: 44.1kHz, 48kHz, 96kHz, 192kHz
- Conversion Speed: 1x to 10x (adjustable under the Spotify app mode on Windows)
- Output Folder: To your preference
- Output File Name: Track Number, Title, Artist, Album, Playlist Index, Year, Disc Number
- Output Organized: None, Playlist, Artist, Album, Artist/Album, Album/Artist, Playlist/Artist, Playlist/Album, Year
Tips:
1. To save the original quality and source format, select "Recommended" from Output Format. Besides, it is recommended to select "Record Mode" as the conversion mode.
2. To download music from Spotify app or web player, use Record Mode. If your network connection is unstable, switch to YouTube Mode to download the same song from YouTube. Intelligent Mode means TuneCable automatically switches between downloading music from Spotify app / web player or YouTube based on your network condition.
3. To maintain playlist sequence in downloads, navigate to TuneCabe's lower left "Settings". Under "Output File Name", retain "Playlist Index" and "Title". In "Output Organized", select "Playlist".
4. The conversion speed is a bit different between the Windows version and the Mac version. The Windows version can convert music at up to 10x speed under both app and web player mode. The Mac version can also convert music at up to 10x speed under the web player mode. However, due to system limitations, the conversion speed under app mode can only be 1x currently.
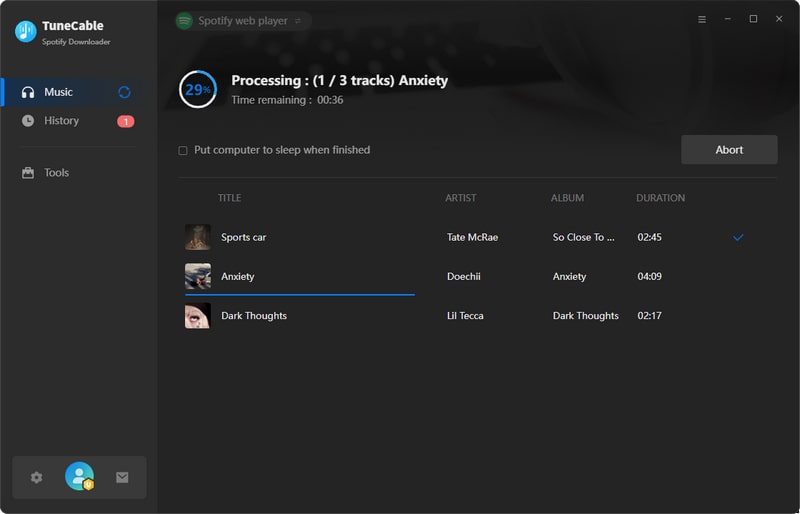
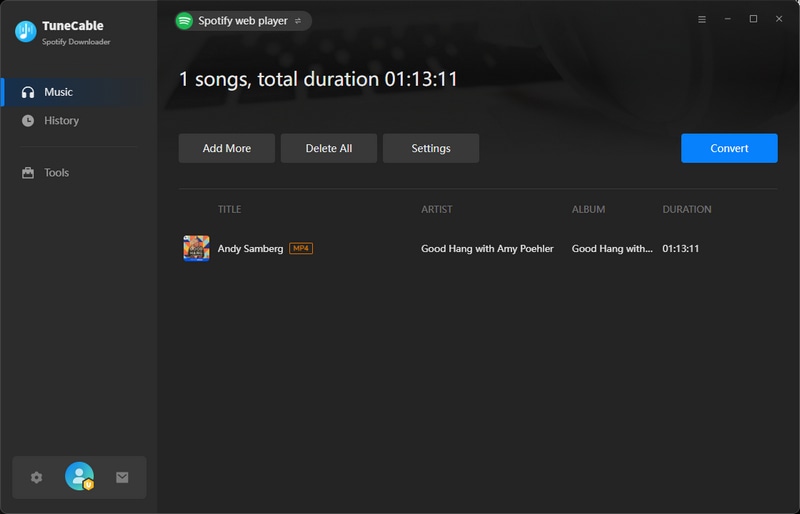
Step 5. Start Converting Spotify Tracks
If you prefer to add more songs to this batch, click on the "Add More" button on this page, and repeat the steps to add more target songs. When finish adding, click the "Convert" button to start converting at your selected speed.
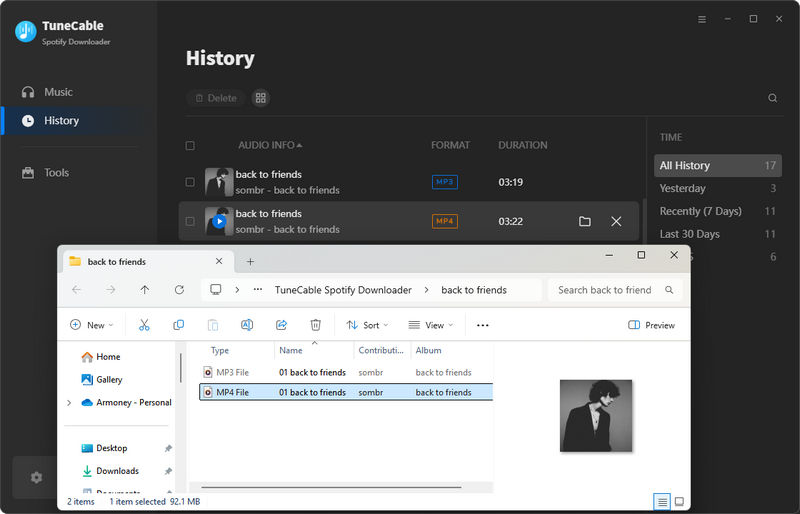
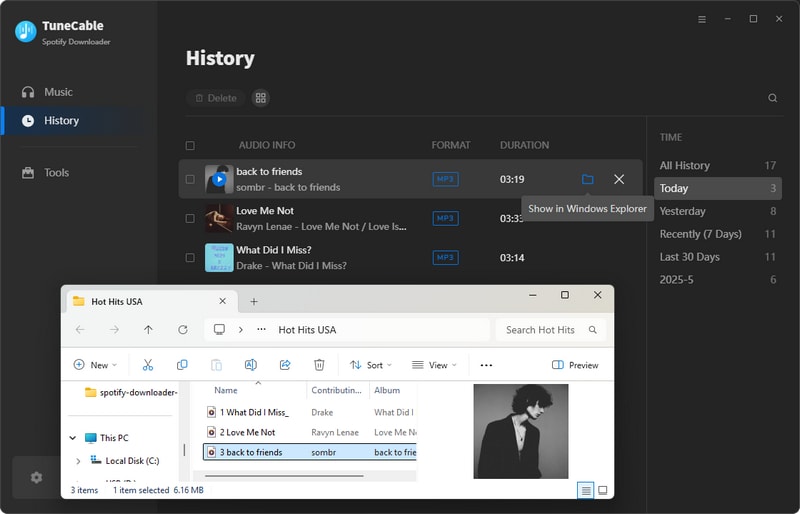
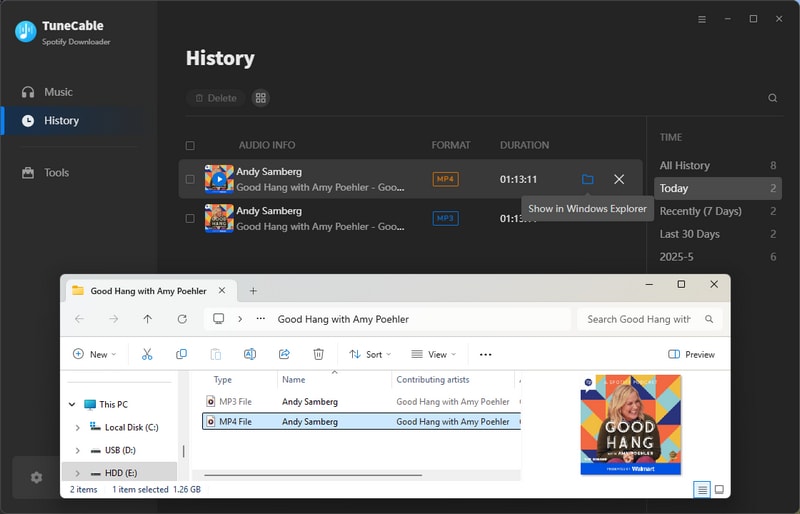
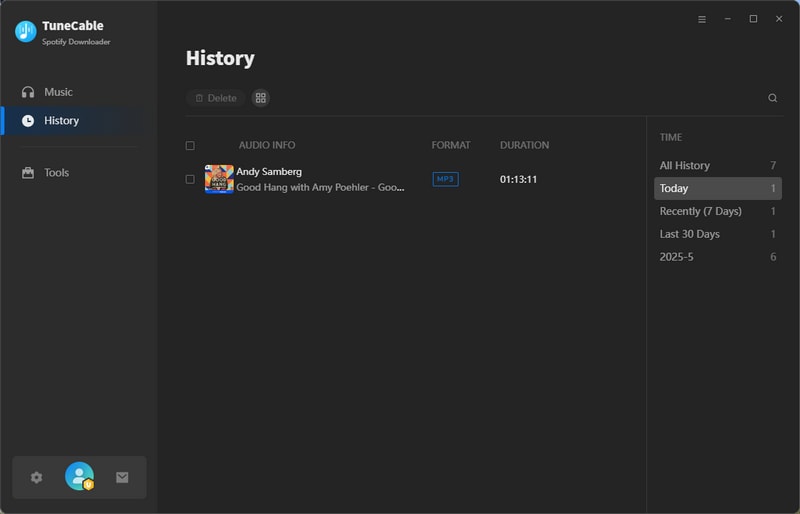
Step 6. Find Converted Spotify Tracks
After conversion, click the "History" tab to find your converted Spotify music.
Part 3. Download Spotify Video Podcasts or Music Videos
3.1 How to Download Video Podcasts:
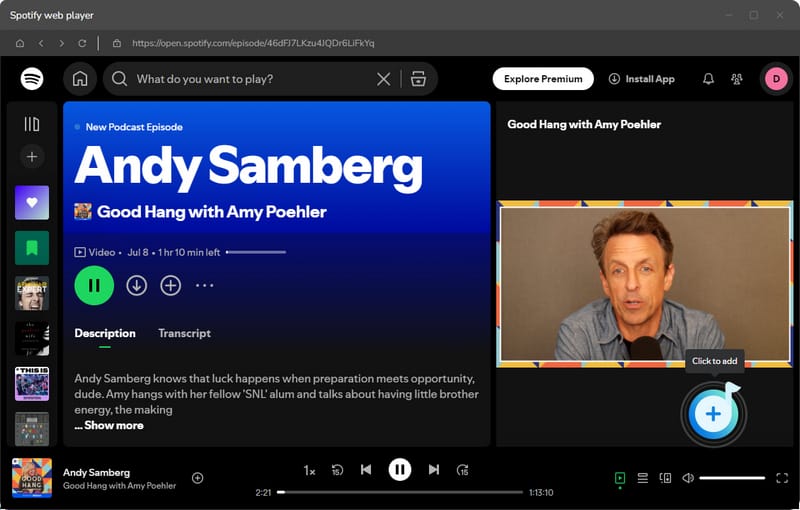
Step 1. Launch TuneCable Spotify Downloader. Go to the top navigation bar and click the "Spotify web player" option to switch the download source. Then log in to your Spotify account.

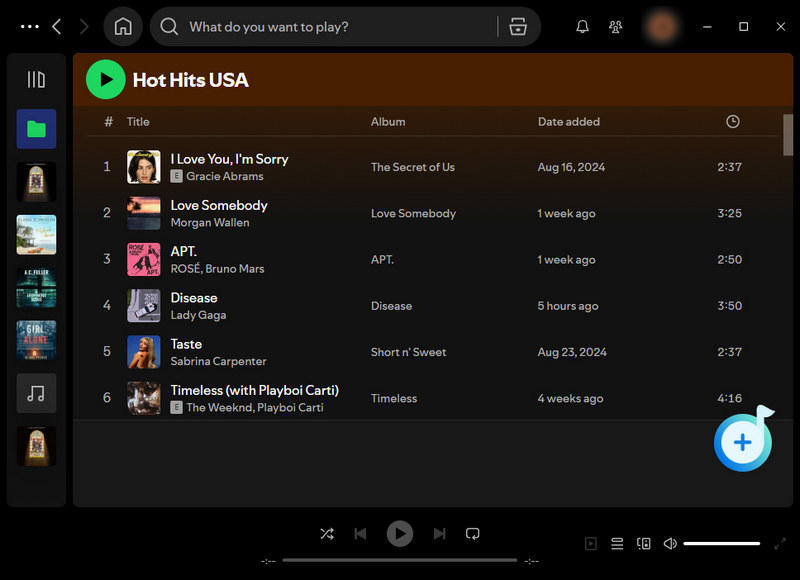
Step 2. Find the video podcasts you like on the Spotify web player. Then, hit "Click to add".
Step 3. Tick the episodes you need and tap on "Add".

Step 4. Click on the "Convert" button to start downloading Spotify video podcasts to MP4 files. When the download is finished, you can check the downloaded video in the "History" module.
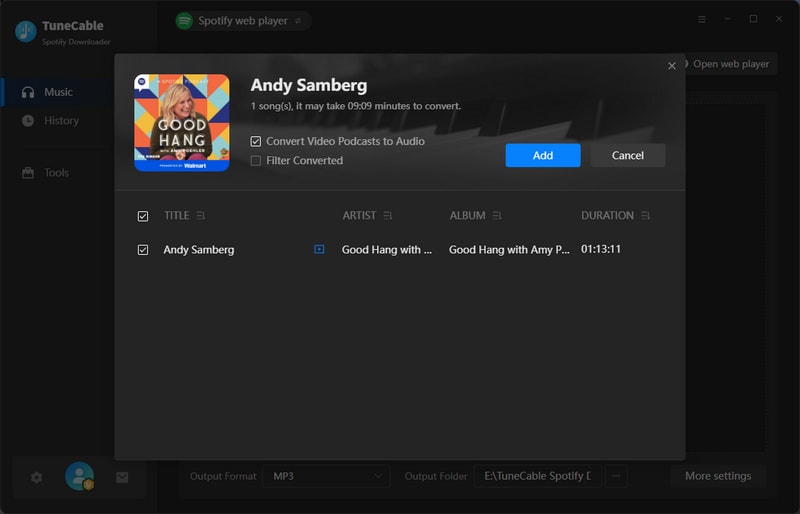
✅ Extra Tip: Convert Video Podcasts to MP3 Audio
If you would like to convert the video podcasts to MP3 Audio, you need to tick the "Convert Video Podcasts to Audio" option after parsing. Then, hit "Add" to move the items to the task list and click "Convert" to start downloading. Similarly, you can check the downloaded MP3 video podcasts in the "History" module.
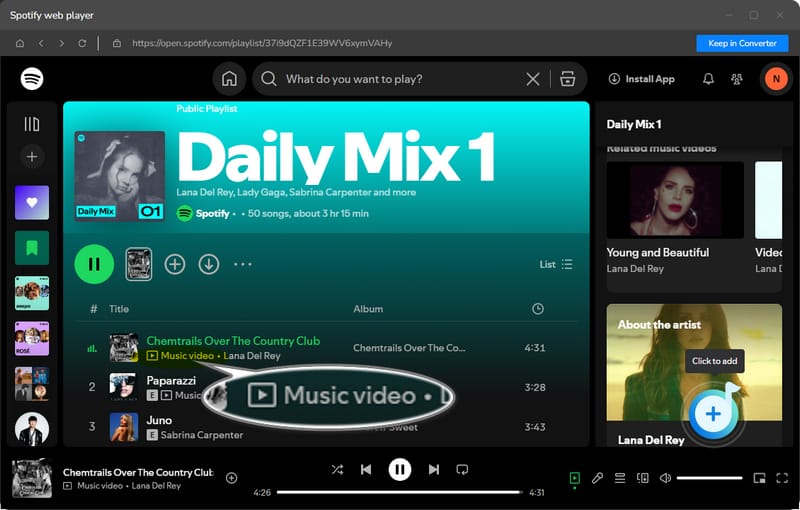
3.2 How to Download Music Videos:
Step 1. Open TuneCable Spotify Downloader. Navigate to the top menu bar and select "Spotify web player" to set it as the download source. Then, log in to your Spotify Premium account.
Step 2. Browse the Spotify web player to locate the music videos you want to download. Click "Click to Add" to queue them for download.
Tips: To find music videos, ensure you're logged into a Spotify Premium account. If a song has a small "Music Video" icon beneath it, it means a music video is available. Note that Spotify Music Videos are currently accessible in 97 markets. Before downloading, verify whether your country or region supports Spotify Music Videos.
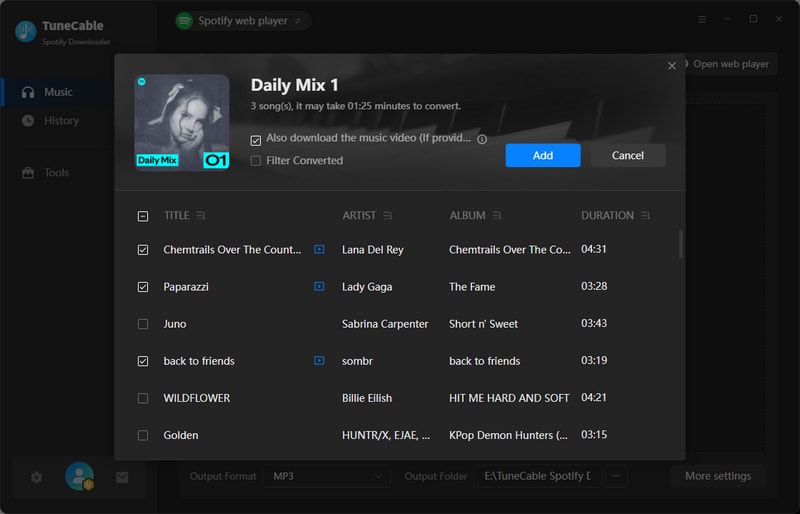
Step 3. Check the box next to the music videos you want, then enable the option: "Also download the music video (if provided)". Finally, click "Add" to proceed.
Step 4. Click the "Convert" button to begin downloading the Spotify music videos as MP4 files.
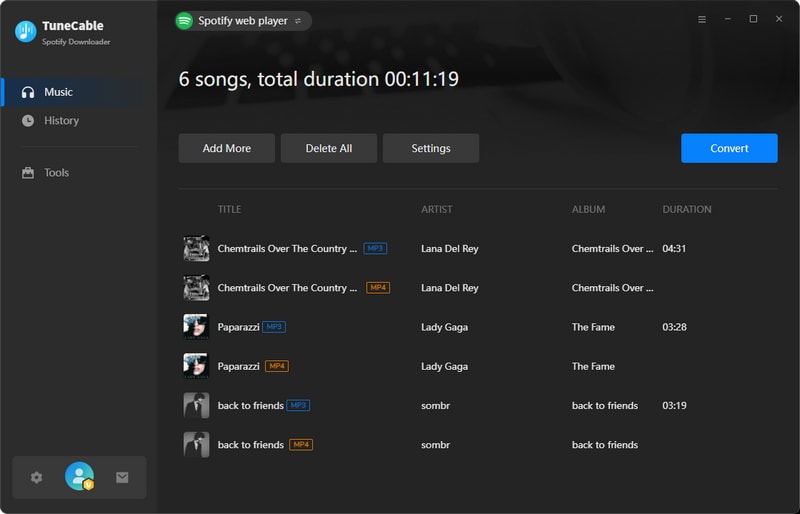
Step 5. Both Spotify music videos and Spotify audio will be downloaded to your local computer at the same time. You may check the downloaded files in the "History" module.